Phase 1 - Setting up the streamers
We want to create audio streamers to broadcast the sounds of the forest remotely on the Internet of Things (IoT). In this way, we can share the audio feed with a community of creatives and scientists for music, installations, collecting data about the state of the forest, and hopefully other applications that will come up along the way.
Ideally, our streamers should be:
- Small and portable.
- Stable and weather resistant, so they can be left in the environment and work for many days without maintenance.
- As ecofriendly as possible.
- The audio quality should be good enough to satisfy musicians’ ears.
Luckily, we don’t have to reinvent the wheel from scratch. The amazing Locus Sonus project runs from 2006 and has solved many of the technical steps needed for our objectives. I’m having a look at their streambox and their hugely helpful step by step tutorial - thanks for that!
The streambox tutorial gives you two options: download their Linux OS, or build it from scratch following the step by step tutorial.
The OS release for Raspberry Pi (RPi) Zero 2 says “unstable” but we really want to work with the Raspberry Pi Zero 2 W: the community is very excited about the processor improvement over the previous version, and we plan to use solar panels to power the RPi so the lower power requirements, in comparison to the 4B or the 5, sound like the way to go. The best option seems to be following the step by step tutorial and trying to build our stable version for the Zero 2 W. Moreover we’d like to contribute to the Locus Sonus project and developing all the steps seems also the best way to propose improvements.
The chosen OS in the Locus Sonus project is Arch Linux, which is said to be cutting edge because of its rolling release. Arch Linux is more complex, has a far smaller community than the other most common Linux releases, you’ll need to choose and install a library basically for any task, and the Raspberry Pi Imager app doesn’t come with the option to flash Arch Linux on the SD card.
In choosing between Arch Linux and the most common and stable Debian-based systems, good old Herbert Simon’s teachings come to mind: when you deal with technologies, think about the machines but think twice about the capabilities of their human users! These projects are mostly used and developed by creatives and DIYers who don’t benefit from the continuous updates a structured team of software developers can provide. Moreover, we suppose that the user might want to turn the RPi into a streamer but also keep using it for other tasks: the vast majority of Linux users are used to Debian-like OSs, so we choose to make our streamer in the current standard RPi OS, Bullseye, a stable Debian-like OS for RPi.
If you, like me, flashed an OS on a RPi before but you don’t do it exactly every month, you might remember the usual steps to establish an Secure Shell (SSH) connection to access the RPi remotely (headless) from your laptop. You had to create the ssh empty file and the wpa_supplicant with a few lines about your LAN. Well, hello, first problem! Since April 2022, the default user and password method no longer works for security reasons. The post also explains the new methods: we used the Advanced Options on the Raspberry Pi Imager App and easily installed Bullseye ready for the SSH session.
We’ll deal later with the network settings to relay the stream to the Locus Sonus website. For now we want to test the stream’s stability, the battery with the solar panel, and the audio hardware. So we’ll split the tasks in three steps that will also work as standalone tutorials:
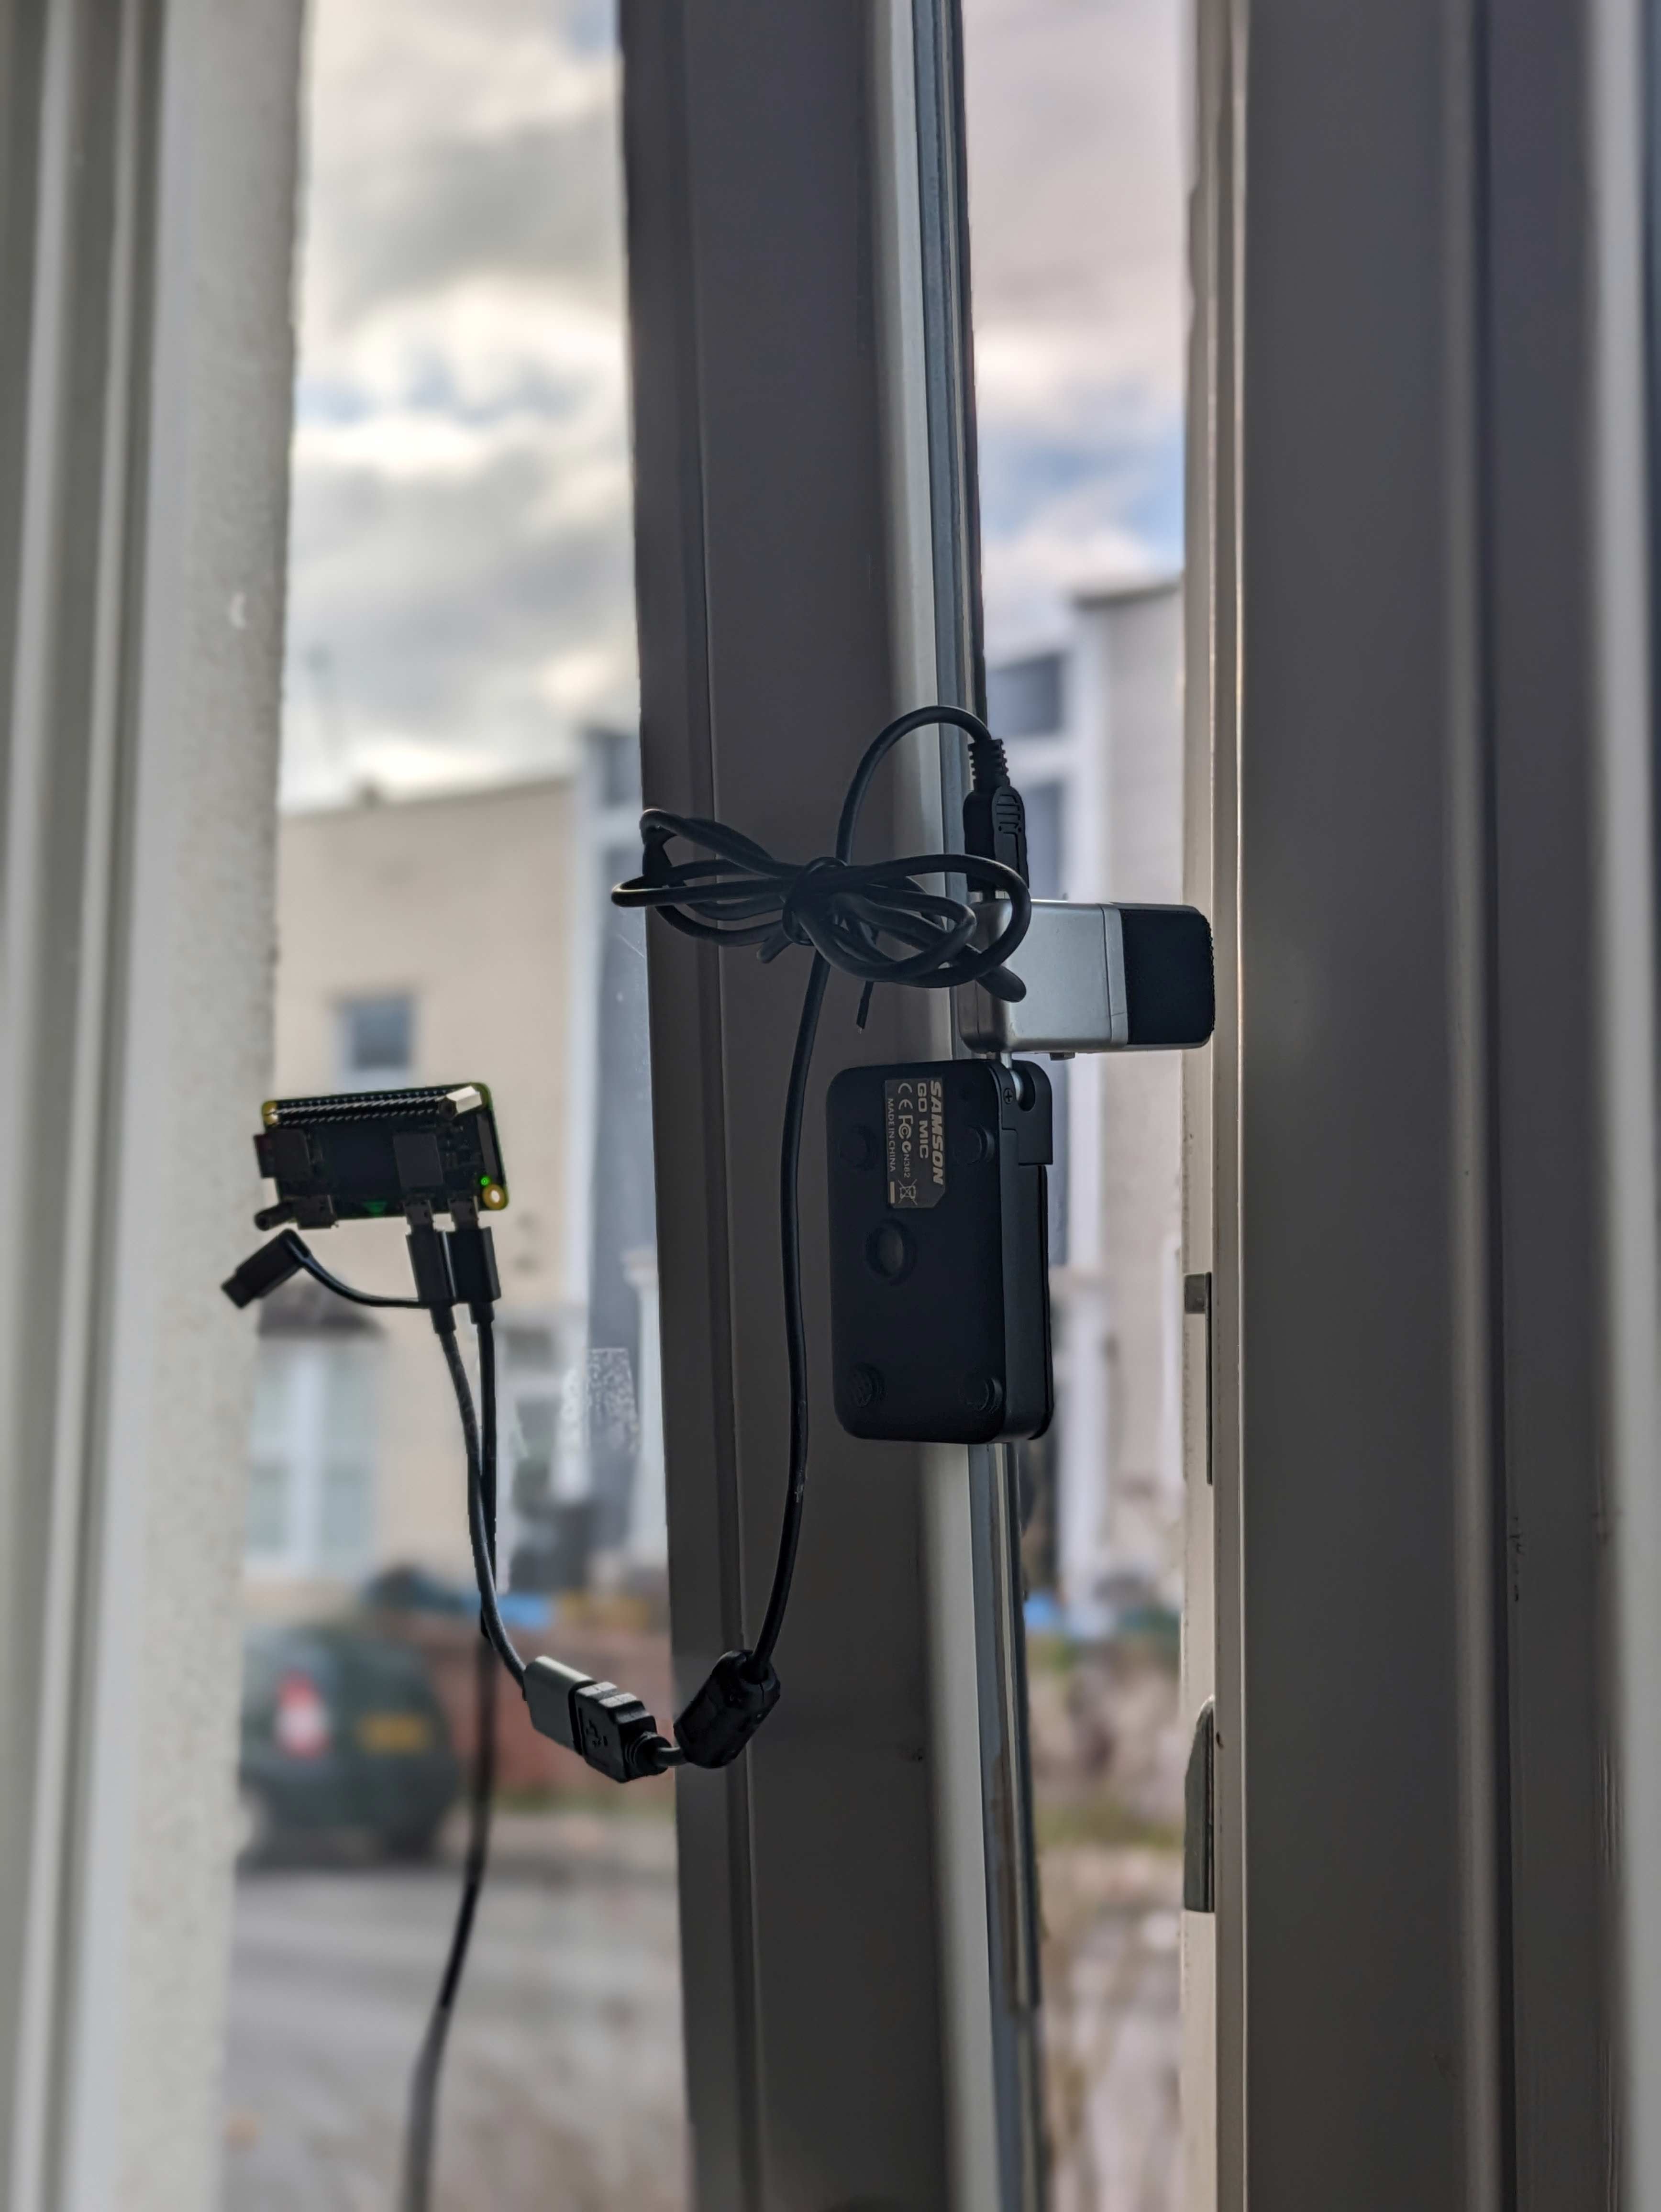
- Set up the streamer with a common USB mic and use it on my window, inside the house, on the LAN.
- Bring the streamer outdoors and create a bird feeder streamer with stereo mics, so we can see how the equipment fares under various weather conditions;
- Deal with the battery and the solar panel in a setting as close as possible to the actual location we’ll place the streamers, and 3d print an enclosure to finalise the object.
The Locus Sonus tutorial uses a library called DarkIce for the streaming part. Currently, the community maintaining DarkIce is small and for updates after the ver 1.3, which are recommended in combination with the most common audio webservers, you have to compile the source codes and very likely download and complile also a few libraries before, etc. But BullsEye comes with ffmpeg already installed: ffmpeg is a very common command line app that can handle the streaming and is widely used for many tasks dealing with AV on Linux. We’ll check before if we can get by with the default software.
In that tutorial there is a step about enabling FastCGI. First we’ll try to skip this one because probably the recent RPi models can handle audio streaming in the blink of an eye, without additional precautions. We’ll have also to do some testing with the audio equipment because the documentation and part of the code written in the Locus Sonus OS is about using and setting up the Cirrus Logic/Wolfson audio devices: unfortunately those are discontinued at the time of writing.
Tutorial 1 - Window audio streamer on a LAN
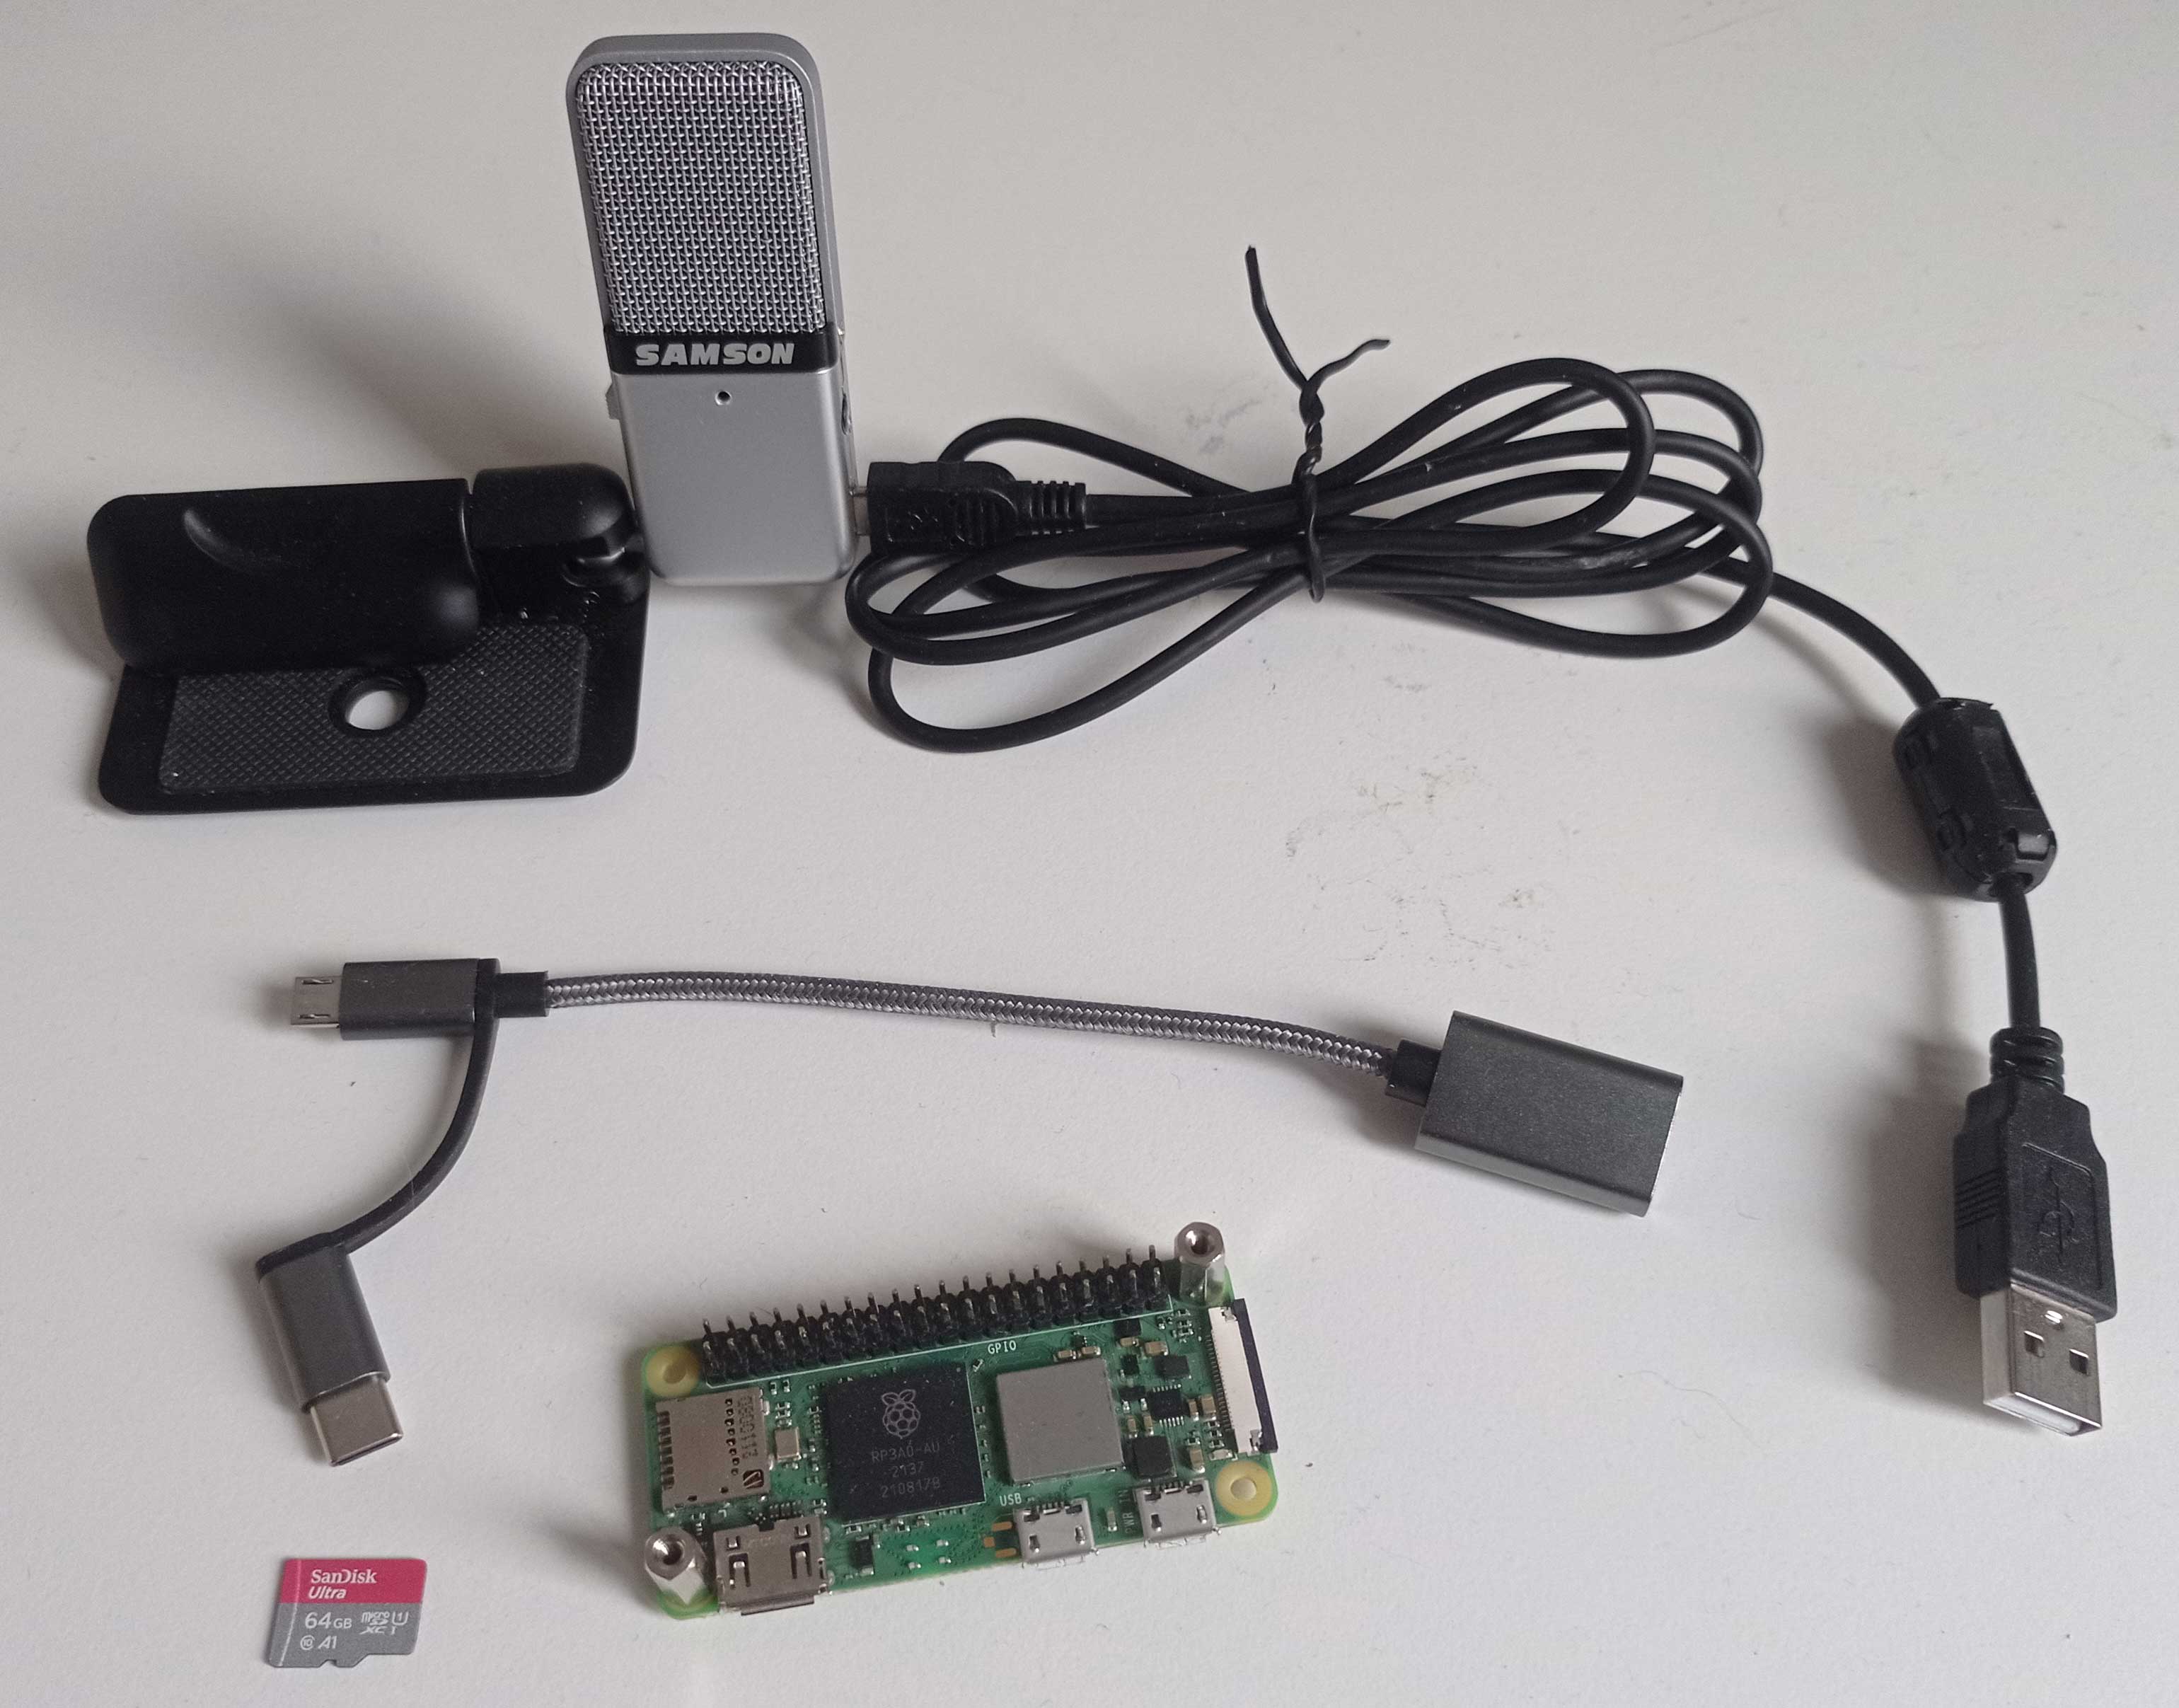
Hardware:
- Raspberry Pi Zero 2 W
- USB microphone
- Adapter from usb-a to micro usb
- Router with port forwarding
Software:
- Raspberry Pi OS 64 bit (Linux 11 - Bullseye)
- Icecast2
- Screen
We used the Samson Go Mic usb microphone and the TP-Link AX5400 router but almost everything should work.
Setting up the mic
USB microphones are the easiest option to capture audio on the RPi. We plug the microphone and run the following command to check if the microphone is detected and which device number is assigned:
$ arecord -l
**** List of CAPTURE Hardware Devices ****
card 1: GoMic [Samson GoMic], device 0: USB Audio [USB Audio]
  Subdevices: 1/1
  Subdevice #0: subdevice #0
Now let’s test the input recording with ffmpeg:
$ ffmpeg -channel_layout stereo -f alsa -i hw:1 -t 30 test.wav-channel_layout stereo isn’t necessary but ffmpeg doesn’t seem to like the mono mic and, without the layout, sends out warnings and uses stereo either way duplicating the input.
-f alsa calls the Advanced Linux Sound Architecture.
-i hw:1 select the input device we just discovered. 1 is the soundcard number. If you need to specify also the device write hw:1,n where n is your device number.
-t 30 records for 30 seconds.
-test.wav is the output file.
In case something doesn’t look right, we can check the OS and ALSA versions installed with the following lines:
$ cat /etc/os-release
$ cat /proc/asound/version
Now we want to listen to the recording on our laptop’s headphones with our audio editing software so we exit the SSH session and copy the file from the RPi to our laptop with the secure copy protocol (SCP):
$ exit
$ scp lu@192.168.0.102:test.wav .
Remember to change my pi username (lu) and local address (192.168.0.102). The last dot specifies the home folder on the laptop where the file will be copied.
Turning the RPi into a web server for audio streaming
We need to turn our RPi into a web server so, for instance, we can write the RPi’s address on our smartphone from everywhere and access an HTML index page saved on the RPi that is streaming the audio capture of the USB mic.
There are many ways to do so. Some of the most common servers you can install on the Pi are NGINX, Apache, and Lighttpd. But Icecast2 helps us here because it is a server already oriented to audio streaming and it is ready to host our stream with a few clicks and settings.
We install Icecast2 with:
$ sudo apt install icecast2We click yes when asked to configure Icecast and we follow the instructions to set up hostname the passwords. The defaults you’ll see for the hostname and passwords are localhost and hackme: if you want, change the password but keep localhost.
Now we use ffmpeg to take the audio from the USB mic via alsa and send it to icecast:
$ ffmpeg -ar 44100 -channel_layout stereo -f alsa -i hw:1 -codec:a "flac" -b:a 256k -f ogg -content_type 'application/ogg' icecast://source:hackme@192.168.0.102:8000/STF_stream0-codec:a "flac" specifies the audio codec, if you want MP3 write -codec:a libmp3lame.
-b:a 256k is the bitrate of the streaming.
In the Icecast address, remember to change 192.106.0.102 with your RPi’s local address. 8000 is the port and unless you changed it, it should be the same. If we are using a standard server like NGINX together with Icecast, you’ll need to change the default port either for Icecast or NGINX: they won’t work both on the 8000 port. Hackme is the default Icecast password: if you changed it during Icecast configuration use your password instead.
If everything is working we should be able to write something like http://192.106.0.102:8000 in our browser address box and we should access the Icecast homepage with the stream ready to be played.
Two little details that could spare you the did-I-spend-one-hour-on-this-for-real moment: it is http and not https and the adress box and the search box in a browser are two different things!
To adjust the volume we can either use the alsa mixer interface or do it from command line.
To use the interface:
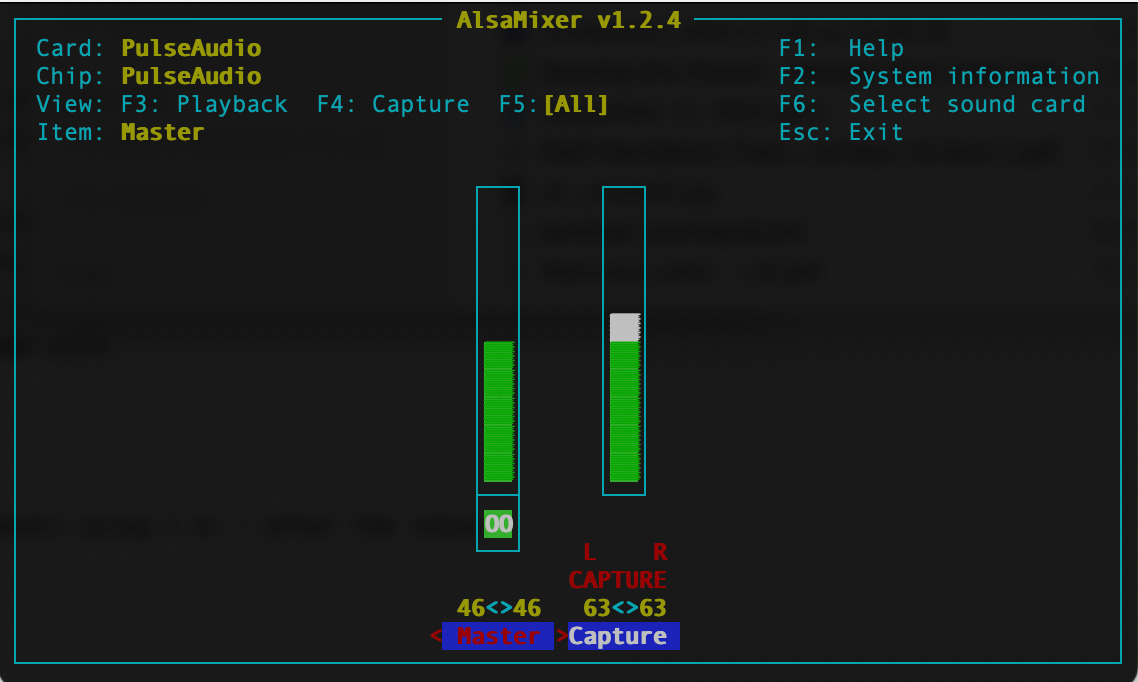
$ alsamixerThe mixer initially shows only the master volume slider. To see the microphone volume we click on f5: all on the alsamixer interface. Then we use the arrow keys to set the values.
To adjust the volume from command line:
$ amixer scontrols
Simple mixer control 'Master',0
Simple mixer control 'Capture',0
Capture is the microphone, so we adjust the volume with:
$ amixer set Capture 50%Or we can change the relative volume with increments using + or - after the value:
$ amixer set Capture 5%+So far so good, but we ran into a tricky problem here. When our laptop, or smartphone, or whatever device we use to program the RPi goes to sleep and drop the SSH session, after a while the SSH session on the RPi also shuts down. And that session was running ffmpeg, which was taking care of our stream, so we try to access again the stream and we discover that we have to turn off and on the RPi and restart the stream.
The first info I found online was about sending “keep alive messages” to server and/or client editing the ssh_config on the Pi and/or the sshd_config file on my laptop. There are some lines one can tinker with (ServerAliveInterval, ServerAliveCountMax, TCPKeepAlive, ClientAliveInterval etc.), but I tried tons of values and nothing changed much.
The welcome solution came with screen. Screen is a terminal multiplexer and allows us to open a session detached from the terminal SSH session, so no matter what happens to the SSH session on the client side (laptop), the new session on the RPi stays open and keeps running ffmpeg. Some quick info can be found here.
So we install screen:
$ sudo apt install screenWe open a screen session called stream:
$ screen -S streamAnd in the new stream session we run ffmpeg with the same line shown above.
With this solution we kept the RPi on for weeks without any SSH session open and we could keep accessing the stream from whatever device: the Pi was happy and stable!
When we reconnect with SSH, to see the ffmpeg lines that tell you the Pi is streaming correctly, we have to restore the session with:
$ screen -r streamScreen sessions work silently in the background so a couple of commends are useful:
$ screen -ls
$ killall screen
The first line shows all the open sessions, the second closes them all.
Accessing the stream from everywhere with port forwarding
Everything works and we can access Icecast homepage writing the Pi local address and the default port in the address box from any device connected to the same wi-fi the RPi is connected to.
Now we’d like to have our friends listening to our cool stream from their houses. This can be done using the port forwarding option in our home router. In short, we open a port in our home network and we access it from outside our LAN. This time we have to write the public address of our network instead of the local one. Keep in mind that this is a safety hazard because an eventual hacker could use the port to access the devices in our LAN. But, unless you have the nuclear codes in a file on your desktop, if the password is strong I’d keep at bay the idea that, as soon as we open the port, there is a hacker ready to infiltrate our computer…
To open a port, we go to our home router configuration page. We find the advanced options and the NAT (Network Address Translation) or port forwarding page. We need to know our public IP address, which can be found either on our router page or googling "find my public address" and using one of the many websites for this purpose. We enter our public address and decide which port we want to open. I chose here 2111.
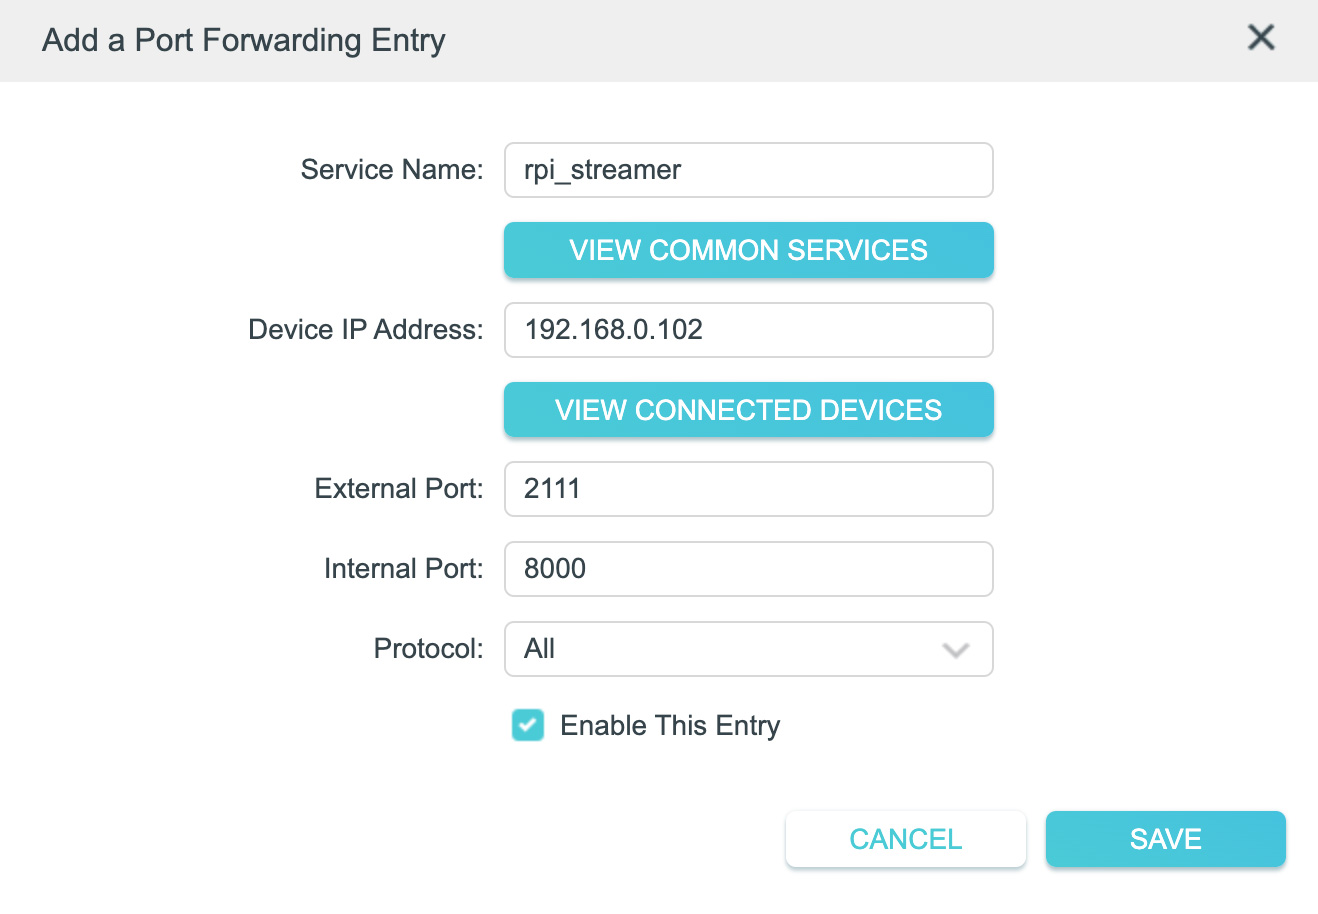
With these settings we tell the router to forward all the messages received at the public address on port 2111 to our local Pi address on port 8000.
Now we should be able to take the smartphone from outside our LAN, write the public IP address followed by a colon and the port number (eg. http://172.111.11.11:2111) and we should be on the Icecast page ready to listen to our RPi microphone.
Keep in mind that Internet service providers change regularly the public IP address for safety reasons, so when you’ll see operation timed out or connection refused check if the public address has changed!
Finalising the project with a bash script
When we turn off our RPi, we’ll have always to rewrite some of the lines shown above unless we write the lines on a text file and call it from command line. This is a bash script.
Our case is slightly more complicated because we need to open the screen session and then run some commands. If we just write the commands on the script as we did on the terminal, ffmpeg will start on the SSH session, with all the problems mentioned, and the new screen session will be empty.
So we create a folder, we write two small scripts, stream.sh and streamdef.sh, and give execute permission:
$ mkdir Stream
$ cd Stream
$ sudo touch stream.sh
$ sudo touch streamdef.sh
$ sudo chmod 755 stream.sh && sudo chmod 755 streamdef.sh
Bash scripts need execute permission to be used, so we need to run the chmod command. Chmod 755 gives execute permission to everyone but only the owner can alter the script. If you want all permissions for everyone use 777 instead. The AND operator && it’s only a way to run two command lines together.
We open the first file:
$ sudo nano stream.shAnd write:
#!/bin/bash
cd ~
screen -S stream ./Stream/streamdef.sh
Stream.sh opens the screen session and passes all the commands in the second script to the new screen session. cd ~ only makes sure that we are in the home folder so the path is always correct.
We open streamdef.sh:
$ sudo nano streamdef.shAnd write:
#!/bin/bash
ffmpeg -ar 44100 -channel_layout stereo -f alsa -i hw:1 \
-codec:a "flac" -b:a 256k \
-f ogg -content_type 'application/ogg' \
icecast://source:hackme@192.168.0.102:8000/STF_stream0
Streamdef.sh contains the definition of the stream. For now it is only the ffmpeg line, so it could be passed directly from the stream.sh file, but certainly more details will be added in the future, so another script looks like a clean solution. Always remember to change the Icecast address and password if necessary.
The \ splits the single command line into more lines, so we can read everything more easily.
Now if we want to start streaming after turning on the RPi we only need to call the first script:
$ Stream/stream.shIf we run the script from the Stream folder we need to prepend dot and slash to tell linux it’s an executable, so use ./stream.sh.
The stream starts in the new session and we can close the laptop terminal without worrying about closing also the stream on the RPi, even if the laptop is complaining that closing the terminal window will stop all the programs.
Next steps
In the next tutorial we’ll install the streamer inside a bird feeder (slightly hacked, of course!), and we’ll move outdoors, to see if our object can stand various weather conditions. Also, we’ll look into mems microphones as a cheap, accessible, and extremely power efficient way to add stereo filed to our streamer.